Last year I threw my darling little sister the most legit
Warrior Cat Birthday Party in all the land. This year I hoped to throw her another fun, unique, and challenging soiree. I presented her with the idea for a Palindrome Party in honor of her 11th birthday--a palindrome in and of itself. I even want so far as to design a palindrome-heavy invitation in a sophisticated but fun color scheme.
But no. She wanted a luau. An eleventh birthday luau. An el-uau, if you will.
I was not happy with her generic choice of birthday theme, but it was her birthday after all. So I obliged...
Luau Party Decor Ideas
I started the party planning with a "trip" to
Oriental Trading. As you might expect if you've frequented this site, there was plenty of selection. But I wanted to avoid to a certain extent things that looked too much like they came from a party store. I steered clear of inflatable items (okay except for one inflatable pig cooler that ended up being so huge that we put it in the pool and it sat 3-4 eleven year old easily) and swirly cutouts meant to hang from a ceiling.
In an effort to deviate from typical luau patterns I bought most of the paper good (napkins, plates, banners, and lanterns) in a brightly colored ikat print reminiscent of a tribal/island motif. Additional paper lanterns in pineapple and blue/green patterns were also purchased to extend the color scheme.
The "Get Tropical" station greeted our eleven year old guests upon arrival. Baskets of colorful pint-sized grass skirts, clip-in hair flowers, and leis from Oriental Trading were arranged in baskets I found lying around the house. The little chalkboard was from Zulilly and the table top tiki totem torches were found, of all places, at the grocery store (Giant). The tropical print tablecloth was picked up from Home Goods for under $15.
In addition to taking home their hula girl ensembles, each girl also took home a beach ball and a personalized pineapple cup, both from Oriental Trading.
Grass table liners in green and tan were purchased for the food and beverage tables from Oriental Trading. Because the food would be outside in June, screened food covers were a necessity. I found cute pink and green covers in a tropical motif by Cynthia Rowley at Home Goods for about $12 each.
Luau Party Decor DIYs
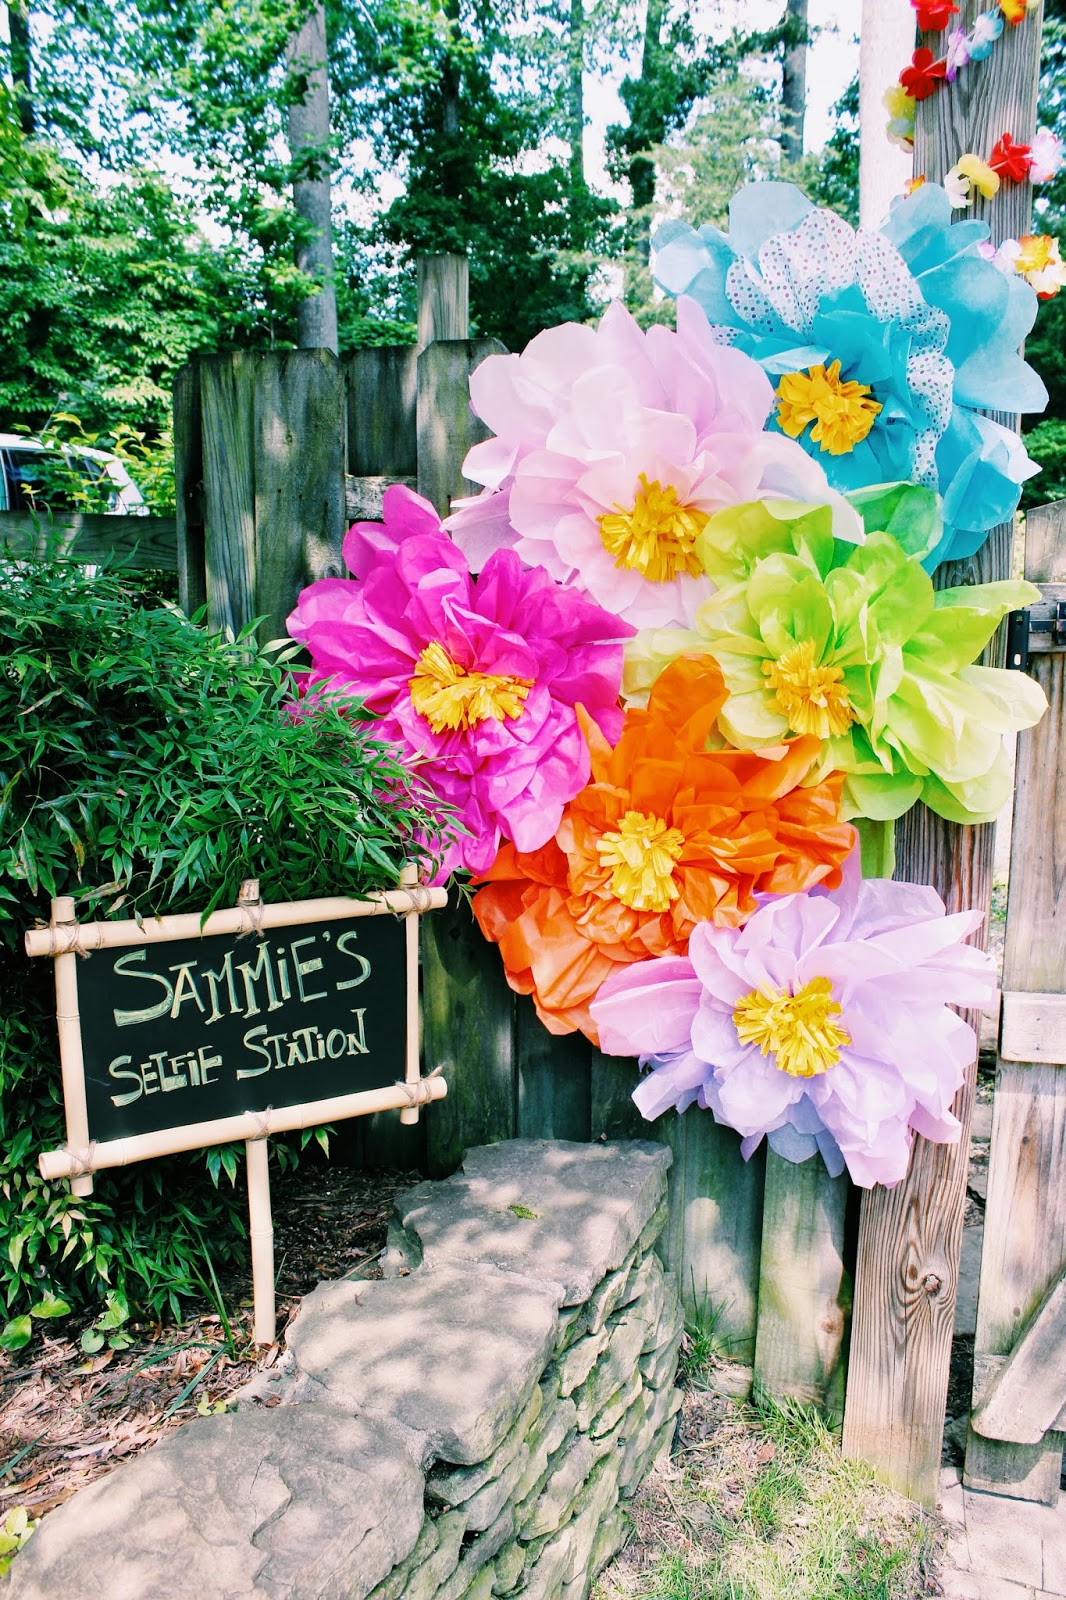
Because my little sister is nearing that age where all things teenager are fascinating, I knew from the beginning I wanted to up the cool factor of her party by adding in a Selfie Station. Her circle of friends are all already toting their own cell phones, so this was a big hit. Had it been a slightly older crowd, I would have also posted up a hashtag for them to share their photos with on Facebook, Twitter, and Instagram. The bamboo-look sign was from Oriental Trading.
These giant flowers added a major impact to the selfie station and the decor in general. They were relatively easy to make and inexpensive...but definitely took some time. I used this tutorial to create them:
Giant Tissue Flower DIY.
I purchased a styrofoam wreath and colorful paper drink umbrellas in bulk from Oriental Trading to make this umbrella wreath. Added bonus: it looked cute hanging on my front door for the rest of the summer. I'm sure you could find a tutorial on how to do this somewhere, but you don't really need one. Just shove umbrellas all over this styrofoam ring and you're done.
Like the tabletop tiki totem lanterns, these larger stake versions were also found randomly at my local grocery store (Giant).
I mentioned these pineapple cups from Oriental Trading earlier. I googled "luau font" and used paint pens to write the names of each of the girls on their own personalized cup.
This cake was my absolute favorite thing about this party. My sister, as usual, wanted an ice cream cake. This meant there was not a whole lot I could do ahead of time to decorate. Whatever I did would need to be done pretty quickly.
I purchased one large can of pirouette cookies, cut them diagonally different lengths, and lined the outside of the plain white cake with them to look like bamboo stalks. I then added the cut off top of a pineapple and some colorful Hawaiian silk flowers (from Oriental Trading). Using the same luau lettering from the pineapple cups, I wrote on the top with a tube of green icing. It took about 20 minutes, including time to cut the cookies (which I did ahead of time).
Luau Party Food Ideas
"Flip flops" were made by drawing with icing tubes on Nutter Butters. Could NOT be easier!
Pig (in a blanket) Roasts were just hot dogs wrapped in crescent roll dough. Silk flower picks from Oriental Trading (the same ones I used on the cake) were stuck in the tops.
This pineapple dip did not turn out so well for me (I think I added too much pineapple juice?), but I was able to salvage it with plain gelatin. Despite the struggle, the end product tasted fine and looked really cute. I got the recipe here:
Pineapple Cream Cheese Spread
These candy kabobs were purchased from Oriental Trading.
Pool noodles: aka Twizzlers (and similar Twizzler-like candy).
Floaties: aka sour gummy peach rings.
The Hawaiian flower picks for the cheese were purchased, you guessed it, from Oriental Trading. Leftover paper umbrellas from the wreath were used to decorate the food tags.
For "real food" we served hot dogs and kabobs.
Beverages were an assortment of fruit punches and lemonades. Guests mixed all the drinks together to create "Hurricanes." The tiki covered cabana was also from Oriental Trading.
Luau Party Fun & Games
Because this party was held at a home with a pool, swimming was an obvious choice of activities for this fête.
Guests also enjoyed a few rounds of Limbo. I'd advise against using a pool noodle as your limbo stick, but eleven year olds thought this was the best choice.
The most fun was probably had with the sack races. Any sack would do, of course, but these luau themed sacks from Oriental Trading were just as inexpensive as the rest of 'em so I figured we might as well.
For all my meticulous planning, I completely spaced on game prizes... and believe me when I say these kids expected to be compensated for their wins. Luckily, in addition to throwing a mean children's party, I'm also great at bluffing. I told them the pineapples (that were picked up from the grocery store) were specifically imported from Hawaii for my sister's "Special Day" and that comparable pineapples could not be found anywhere else in this time zone.
It worked.


.jpg)
-Edit-2.jpg)
-Edit.jpg)
-3.jpg)
-2.jpg)
.jpg)
-Edit.jpg.jpg)
.jpg)
.jpg)
-4.jpg)
-2.jpg)
-Edit.jpg)
-2.jpg)
-2.jpg)
_pe_pe.jpg)
-2.jpg)

-2.jpg)
_pe.jpg)
.jpg)
-Edit-3.jpg)
-3.jpg)