
I decided I wanted a deco mesh wreath for my front door this year, but the ones I wanted were all in the $100-300 range. Clearly, it was time to craft. Here's how to did it:
1. Measure your door.
Mine was liiiike...17 feet all the way around? I don't remember.
2. Gather supplies.


Here's what you'll need:
-Deco mesh (PRO TIP: Get this at Costco. I didn't look online, but this was by far the best deal of the in-person shopping I did. Better than Michael's and yes, better than Wal-Mart. If you must get it from Wal-Mart, check the floral section before the Christmas section. It is cheaper there. At Costco I paid $6.50 or so for a pack of 2 giant rolls.)
-A plain garland (I originally tried to use wire but had zero success with this. For my second attempt I bought the cheapest white garland I could find from Wal-Mart. It was $5 for 40 feet.)
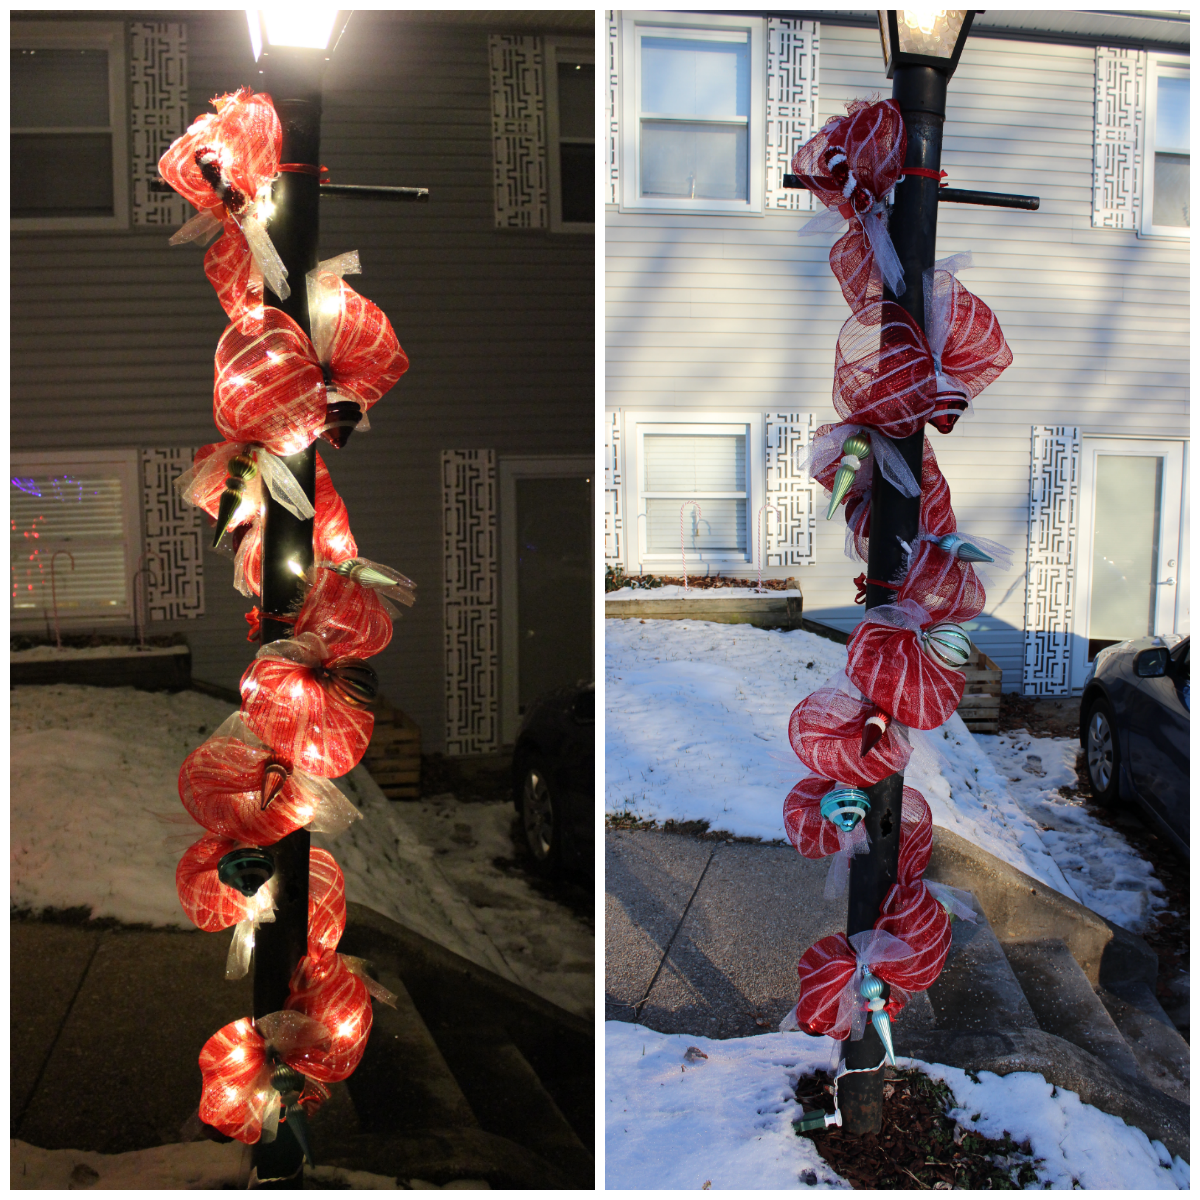
-String lights (I used two strings of 50 for over the door and one string of 50 to wrap up my light post.)
-Pipe cleaners to match your color scheme. After creating a door garland, a light post garland, and three wreaths, I had used 3 packs of these. They can be found in shiny red in the Christmas section of the dollar store.
-Wire cutters or strong scissors to cut the pipe cleaners
-Decorative stuff. I used large box of shatter resistant ornaments from Costco ($25), a couple medium containers of large shatter resistant ornaments from Wal-Mart, and a huge shatter resistant ornament ball also from Wal-Mart. The big glitter bows, the red and white ribbon, the glitter tulle, and the chevron burlap were all from Wal-Mart as well. Be sure to check the floral section for selection not found in the Christmas section.
-Something to hang your garland with. I tried the removable Command hooks outside on our siding but they didn't work. We ended up having to nail them into the siding, which I was wholly opposed to, but my husband seemed to think this was okay. Wal-Mart sells something for about $30 specifically for hanging a door garland, but I haven't tried it.
3. Lay out your garland.

Since my garland was 40 feet and I only needed about half that, I doubled it over to make it stronger and cut off the excess. Jackson Lloyd helped.
4. Use small sections of pipe cleaners to attach the lights to the garland.
This actually was kind of a process. I might have called the whole thing off like a big quitter, but luckily I have a handy-dandy husband to listen to me bitch and then help me out. We did this by finding the center of the garland, attaching the center of the lights, and working from there. He was also kind enough to wrap up the connect-y parts so I didn't have a gap in the lights where the strands connected. Make sure you test the lights.


5. Use sections of pipe cleaner to attach the deco mesh to the garland/lights.
The mesh I used was wide so I folded it in half length-wise while attaching it. You can use your own discretion here, but every six inches or so, bunch of the mesh and secure it.


Get your cat to help.


6. If you're adding ribbon, do that now.
The chevron burlap I used was wider than I wanted, so, with a little help, I folded it in half and stapled it before attaching it. This way, both sides would be decorative. I used pipe cleaners to attach it at every gather in the deco mesh.


7. Plan out how the garland will hang and start decorating!
I wanted the sparkly bows to be in the corners and the big ornaments to be in the center so I had to measure and plan out where that would be. If your garland is going to be the same throughout, you can just start decorating.


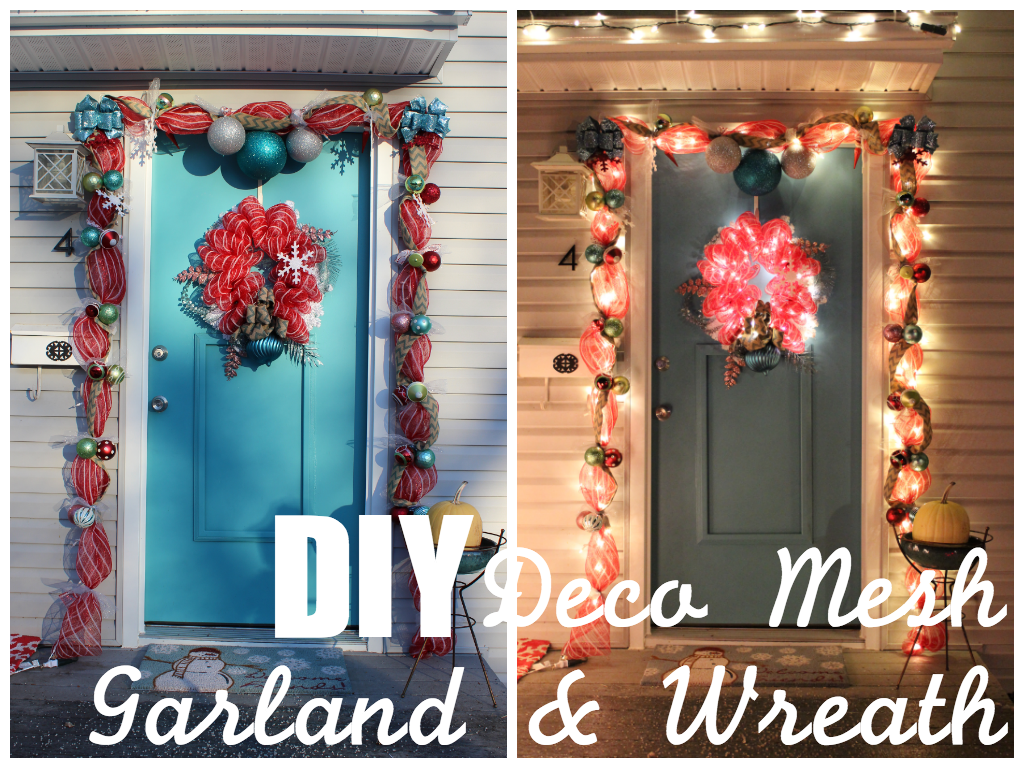
8. What are you waiting forrrrr? Hang it up!
That looks goooood boo.

Hey, you wanna matching wreath?
O'course ya do.
The wreath works almost entirely the same way as the garland. The only difference is that you'll want a more substantial garland for the base. I purchased this and was able to use for two wreaths:


This garland was $8 but was on sale for half off and I had a coupon for another 25% off. I added big bunches of deco mesh to the center of mine, but below you'll see two other options: one with small bunches of deco mesh around the center and another where the whole garland is covered.


This is an example of smaller bunches around the center that my friend Clare created:


And this is my finished wreath to match the garland, before I added lights:


And if you get really carried away...
I COULDN'T STOP.
Here's the Finished Product
We bought our home last year just before Christmas, but we didn't have time/money/motivation to put lights up. I was so excited to put lights up this year for the first time.


I have never attempted to be this crafty with my Xmas decor.. but you make it look so fun!
ReplyDeleteWanna come help guide me? I make hot cocoa with sprinkles!!! :P
There isn't much I won't do for sprinkles but of course I've been buried alive in projects over here and am only just now seeing your comment...after Christmas...
DeleteHow do you attach the lights?
ReplyDeleteThey're wrapped up inside the decomesh, so when I attached the pipe cleaners, the lights just stayed inside there.
DeleteI was very pleased to find this site.I wanted to thank you for this great read!! I definitely enjoying every little bit of it and I have you bookmarked to check out new stuff you post. Best Glucosamine Supplement Singapore
ReplyDeleteReally intriguing to find out. I truly choose to review this kind of pleasant document. Love! protect rocking. 1940 california license plate
ReplyDeleteWhat a fun and creative DIY—your step-by-step on the deco mesh door garland is super inspiring! If you’re thinking of upgrading the base before getting crafty on décor, a premium brass main door design & front door embellishment (see: https://www.artisticks.co.in/brands/dwari-doors/
ReplyDelete) gives you a beautiful, sturdy foundation for all the mesh, ribbon and ornament accents.